
Learn how to program your Rasberry Pi Pico and Pico 2 with the Arduino IDE! Whether you’re a bloody beginner or already have some experience with microcontrollers in general or specifically with the Pico, this guide is here to help.
#1 Why use the Arduino IDE?
Here are some of the most significant points why you should use the Arduino IDE to program your Raspberry Pi Pico:
- User-Friendly Interface: The Arduino IDE is known for its simplicity and user-friendly interface. It’s an excellent choice for both beginners and experienced developers.
- Community Support: The Arduino community is large and active, providing many resources, tutorials, and forums. If you encounter any issues or have questions, you’re likely to find solutions and support from the community.
- Extensive Libraries: The Arduino IDE comes with a huge collection of libraries that simplify complex tasks. These libraries can be helpful when working with the Raspberry Pi Pico, saving time and effort.
- C/C++ Programming Language: C/C++ is widely used in embedded systems programming, making it easier for developers to transfer skills and knowledge between different platforms. Also, C/C++ is way more efficient than MicroPython, which is also often used with the Pico.
- Seamless Integration: The integration of Raspberry Pi Pico into the Arduino IDE has been designed to be straightforward. This allows us to take advantage of the features of the Raspberry Pi Pico without dealing with complex configurations or setup processes.
#2 Installing the Arduino IDE
Let’s start by installing the Arduino IDE itself. If you already got it installed on your computer, feel free to skip to the next step.
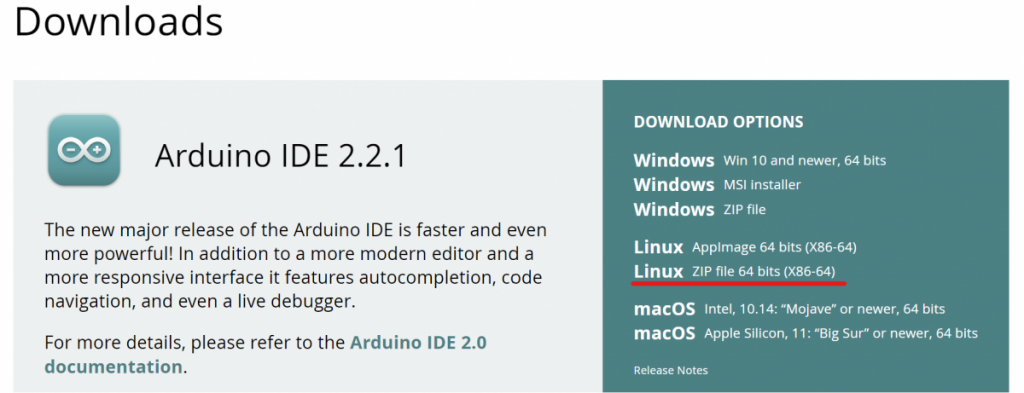
Luckily, this step is really straight forward. Simply download the corresponding file for your operating system from the official download page.
Windows
To install the Arduino IDE on Windows, simply run the file you’ve downloaded from the download page. Then, follow the instructions in the installer.
After starting the IDE for the first time, it will ask you to install some additional USB drivers. If so, click allow or next to let the IDE install everything it needs.
Linux
On Linux, make sure to download the ZIP file.
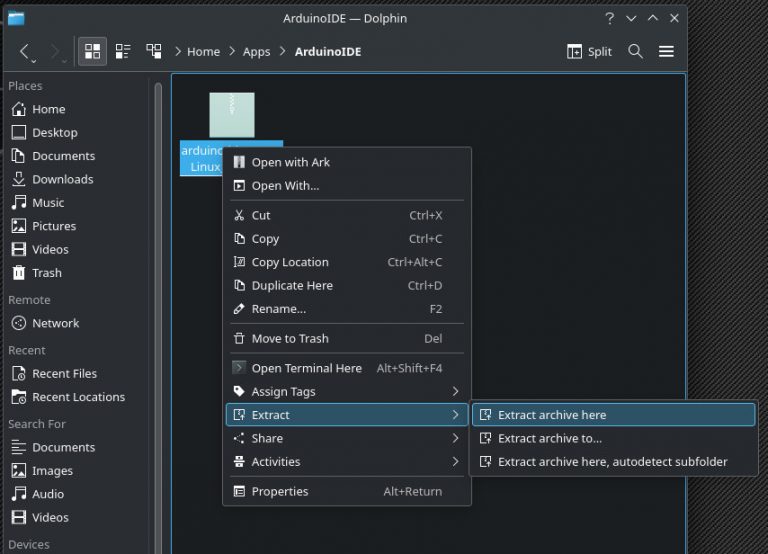
Next, extract the file in the folder, where you want to place the Arduino IDE.
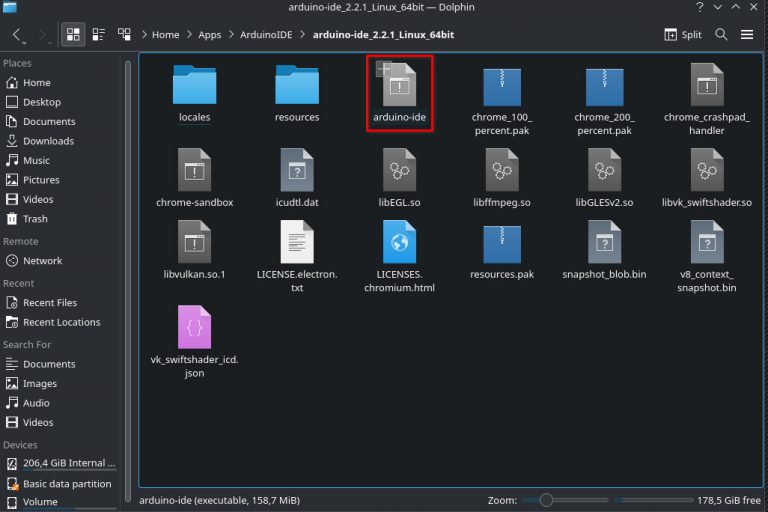
To start the IDE, simply run the arduino-ide file. You can also create a shortcut on your desktop.
MacOS
On your MacOS computer, simply copy the downloaded file into your application folder!
#3 Setting up Pico Development
Note that there are two versions of the Arduino IDE. This tutorial is using the Arduino IDE 2. However, if you are using the Arduino IDE 1, you can still follow along, as all the steps are very similar.
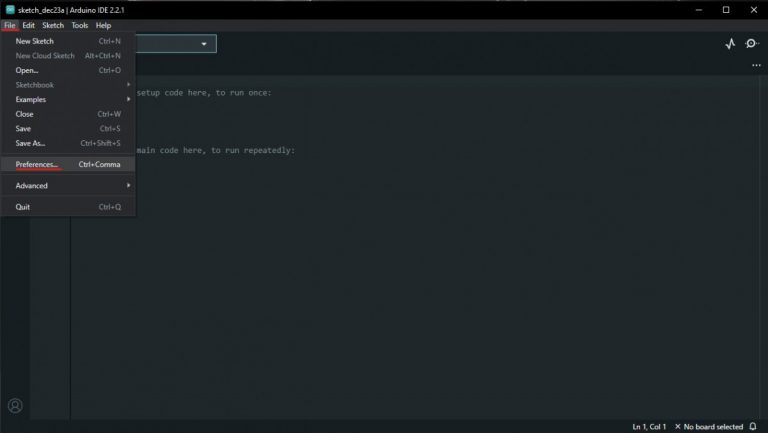
To begin programming our Pico with the Arduino IDE, we first need to add the Raspberry Pi Pico board to the Arduino IDE. To do so, we need to add a board manager URL from GitHub.
Go to File and then Preferences:
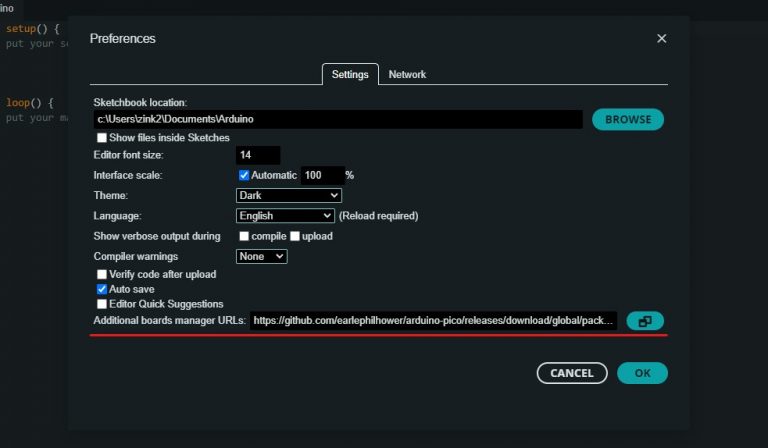
In this menu, paste the following link to a third party GitHub repository by Earle F. Philhower, which will allow us to select a ton of additional boards like the Raspberry Pi Pico and Pico 2.
https://github.com/earlephilhower/arduino-pico/releases/download/global/package_rp2040_index.json
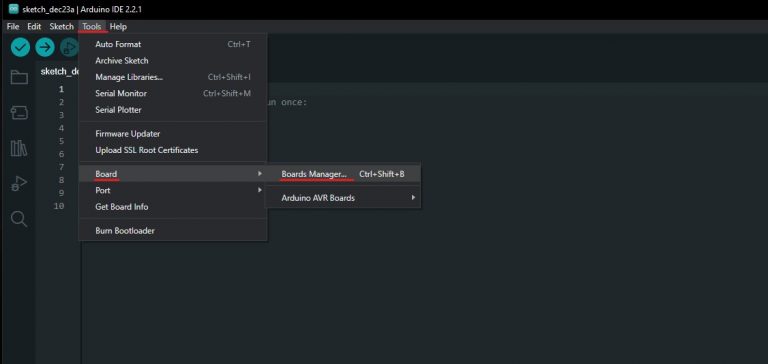
After the IDE has downloaded the additional boards manager resource, we need to install the Raspberry Pi Pico/RP2040 boards manager by Earle F. Philhower.
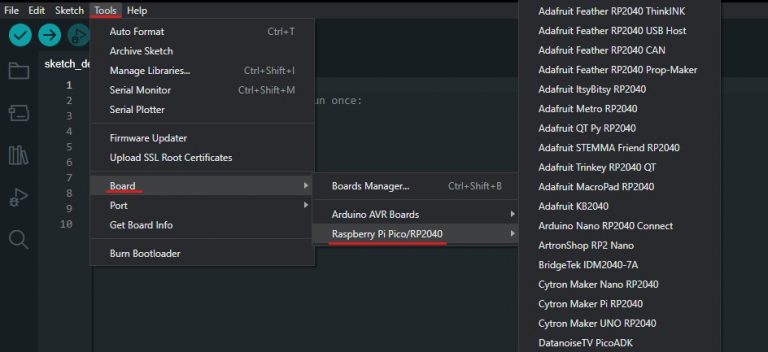
To do so, hit tools, Board, and Boards Manager.
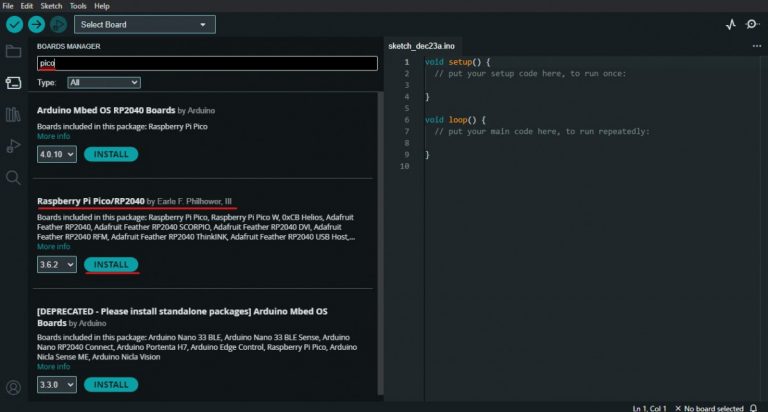
Even though it only says RP2040, this boards manager also works for the Pico 2 with the RP2350 microcontroller.
Now, search for pico and install the Raspberry Pi Pico/RP2040/RP2350 manager by Earle F. Philhower.
All the things needed for us to start working with our Raspberry Pi Pico are now set up. In the next step, we’re going to connect the Pico board and run our first sketch.
#4 Compiling and Running the Code on the Pico
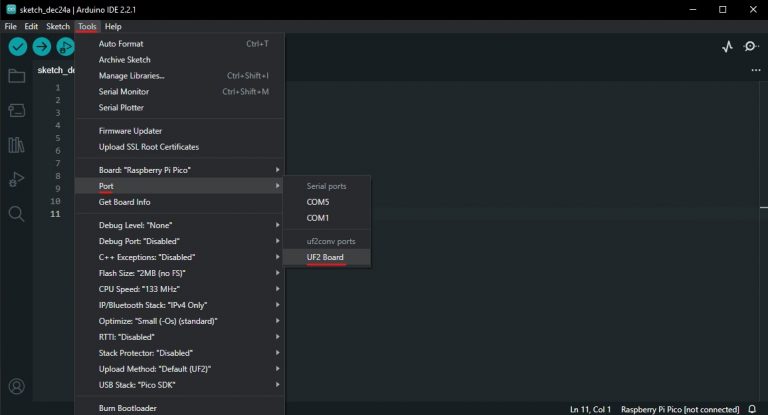
Before we connect the Pico via USB, we first select it in the Arduino IDE. Also, make sure to select Raspberry Pi Pico W, if you’ve got the Pico W with WiFi and Bluetooth capability.
Now it’s time to plug in your Raspberry Pi Pico. Make sure to hold down the BOOTSEL button on your Pico while plugging it in.
Now, a new option UF2 Board should appear if you go to Tools and then Port. Select it and upload your first sketch. You can use this blink example.
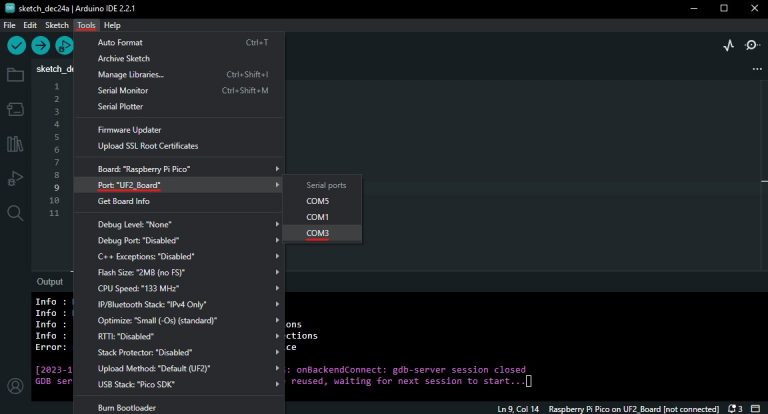
After uploading your first sketch to the Pico, you don’t have to plug the Pico in while holding the BOOTSEL button to upload a new sketch.
Instead, simply connect the Pico normally via USB and select its COM port under Tools > Port
(It won’t be named UF2 Board anymore)
If it’s the first time uploading a new sketch, you may also need to restart your Arduino IDE in order to make it work.
That’s it, you should now be able to program your Raspberry Pi Pico using the Arduino IDE!
#5 Blink Example
				void setup() {
  pinMode(LED_BUILTIN, OUTPUT); // The built-in LED on your Pico board
}

void loop() {
  digitalWrite(LED_BUILTIN, HIGH);
  delay(500);
  digitalWrite(LED_BUILTIN, LOW);
  delay(500);
}
Thanks for reading, consider sharing!