
When building IoT systems with the ESP32, MQTT is a popular protocol for transmitting sensor data. However, by default, MQTT is not encrypted and doesn’t authenticate devices, making it vulnerable to unauthorized access. In this guide, you’ll learn how to secure MQTT communication between ESP32 boards and a Mosquitto broker using SSL/TLS encryption and authentication.
We’ll use Let’s Encrypt to issue a trusted SSL certificate, configure the Mosquitto broker securely, and modify the ESP32 sketch to support secure connections.
Note: This guide assumes you’ve already set up a basic Mosquitto broker. If you don’t have a working Mosquitto broker, make sure to check out this guide on how to set up Mosquitto on a Raspberry Pi first.
What You’ll Need
- ESP32 development board
- Linux MQTT Broker (e.g., Raspberry Pi)
- Arduino IDE/PlatformIO with ESP32 board support
- A public domain pointing to your MQTT broker server
Step 1: Install Certbot and Generate SSL Certificate
If we want to make use of SSL encryption, we need to generate an SSL certificate for the domain that points to the MQTT broker. Luckily, we can easily get a free certificate using Certbot and Let’s Encrypt.
Execute the following commands in the terminal of your Linux MQTT server. These will install certbot and request a certificate from Let’s Encrypt for your domain.
1.1 Install Certbot
sudo apt install certbot1.2 Use Certbot to Generate a Free SSL Certificate
sudo certbot certonly --standalone -d your-domain.com(1.3 Fix Permissions on Certificate Files)
Sometimes, there can be permission issues when Mosquitto tries to access the certificate files. Hence, we will create a user group called ssl-cert (usually it already exists) that has access to the cert files. The mosquitto user will be added to the ssl-cert group so that it can also access the files.
Start by creating the ssl-cert group. Usually, this group already exists. Nevertheless, we add it just to be sure.
sudo groupadd ssl-certAdd the ssl-cert group to the cert files.
sudo chgrp -R ssl-cert /etc/letsencrypt/archive/your-domain.com
sudo chgrp -R ssl-cert /etc/letsencrypt/live/your-domain.comThen, give the ssl-cert group read access.
sudo chmod -R g=rX /etc/letsencrypt/archive/your-domain.com
sudo chmod -R g=rX /etc/letsencrypt/live/your-domain.comAdd the mosquitto user to the group.
sudo usermod -aG ssl-cert mosquittoStep 2: Configure Mosquitto for SSL and Authentication
Next, we need to configure Mosquitto to enable secure communication via SSL/TLS. Additionally, we will set up user authentication so that clients have to log in via username and password.
2.1 Create a Password File for MQTT Users
sudo mosquitto_passwd -c /etc/mosquitto/passwd esp32userOptional: Create an ACL file
An ACL (Access Control List) restricts access to MQTT topics. Using an ACL file, you can specify which MQTT users are allowed to subscribe/publish to which topics.
nano /etc/mosquitto/aclIn the editor, enter your rules for each user and save the file.
user esp32user
topic readwrite sensors/humidity

user userB
topic read sensors/humidity2.2 Edit the Mosquitto Config File
To enable encryption, we need to specify the file paths to the certificate files and the password file. Edit your mosquitto.conf the following way, and make sure to correct the file paths.
nano /etc/mosquitto/mosquitto.conf# MQTT secure port
listener 8883
# SSL/TLS config
cafile /etc/letsencrypt/live/your-domain.com/chain.pem
certfile /etc/letsencrypt/live/your-domain.com/cert.pem
keyfile /etc/letsencrypt/live/your-domain.com/privkey.pem
require_certificate false
# Authentication config
allow_anonymous false
password_file /etc/mosquitto/passwd
#acl_file /etc/mosquitto/aclUncomment the last line to also enable the ACL (Access Control List).
2.3 Restart Mosquitto and Test Authentication
That should be it on the server side. Let’s quickly check whether everything is working as intended.
First, restart Mosquitto to apply the changes in the config file.
sudo systemctl restart mosquittoNext, try to publish a test message to the topic “test” with the following command.
mosquitto_pub -h your-domain.com -p 8883 --capath /etc/ssl/certs/ -u esp32user -P yourpassword -t test -m "hello"Make sure to specify your correct domain, the correct credentials, and make sure that the specified user is allowed to publish to this topic (check ACL).
If everything worked, you shouldn’t get any response!
Step 3: Program the ESP32 to Use Secure MQTT
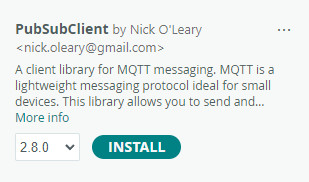
3.1 Install the PubSubClient Library in Arduino IDE
Before we can securely use MQTT on the ESP32, we need to install the PubSubClient Library in the Arduino IDE.
In the Arduino IDE, head to Sketch > Include Library > Manage Libraries … and search for PubSubClient.
3.2 Get the ISRG Root X1 Certificate
When the ESP32 connects to the broker over SSL/TLS, it needs to verify that the broker’s certificate is signed by a trusted authority. Let’s Encrypt certificates are signed by the ISRG Root X1 certificate, which is the root of trust that confirms your broker’s identity.
By embedding this root CA in your ESP32 sketch, you enable the device to authenticate the broker and prevent man-in-the-middle attacks.
Download the full Let’s Encrypt CA chain:
https://letsencrypt.org/certs/isrgrootx1.pemOpen the .pem file and paste its contents into the Arduino sketch that follows.
3.3 ESP32 Secure MQTT Publisher Sketch
#include <WiFi.h>
#include <WiFiClientSecure.h>
#include <PubSubClient.h>

const char* ssid = "YOUR_SSID";
const char* password = "YOUR_WIFI_PASSWORD";
const char* mqtt_server = "your-domain.com";
const int mqtt_port = 8883;

const char* mqtt_user = "esp32user";
const char* mqtt_pass = "yourpassword";

// Let’s Encrypt ISRG Root X1 Certificate
const char* root_ca = \
"-----BEGIN CERTIFICATE-----\n" \
"MIIFazCCA1OgAwIBA...\n" \             // Truncated
"emyPxgcYxn/eR44/K...\n" \
"-----END CERTIFICATE-----\n";

WiFiClientSecure espClient;
PubSubClient client(espClient);

void setup() {
  Serial.begin(115200);

  // Connect to WiFi
  WiFi.begin(ssid, password);
  while (WiFi.status() != WL_CONNECTED) {
    delay(500); Serial.print(".");
  }
  Serial.println("\nConnected to WiFi");

  // Connect to Mosquitto Broker
  client.setServer(mqtt_server, mqtt_port);
  espClient.setCACert(root_ca);
  while (!client.connected()) {
    Serial.print("Connecting to MQTT...");
    if (client.connect("ESP32Client", mqtt_user, mqtt_pass)) {
      Serial.println("connected");
    } else {
      Serial.print("failed, rc=");
      Serial.print(client.state());
      delay(2000);
    }
  }

  // Publish secure MQTT message
  client.publish("esp32/test", "Hello Secure MQTT");
}

void loop() {
  client.loop();
}Make sure to replace all the constants with your own values and fill in the root_ca!
Check the serial monitor to see whether the ESP32 connected to the broker successfully. If you get the error code “-5“, that means that authentication failed. In that case, check your username and password.
If you get the error code “-2“, that means that the ESP32 couldn’t connect to the broker. Probably there’s a problem with the certificate, the domain, or your firewall is blocking MQTT traffic.
Hint: Check out this guide for a receiver sketch as well!
Conclusion
You’ve now learned how to secure MQTT communications between your ESP32 devices and a Mosquitto broker using SSL/TLS and authentication using a username and password. This setup protects your IoT devices from unauthorized access and ensures data integrity over the network.
Got any questions or issues? Please share them in the comments below!
Thanks for reading!
Links marked with an asterisk (*) are affiliate links which means we may receive a commission for purchases made through these links at no extra cost to you. Read more on our Affiliate Disclosure Page.