

If you read this article, you probably already know what SSH is and its use for remotely accessing Linux servers, but did you know that also Windows officially supports OpenSSH? If you want to access your Windows computer or server using SSH, you simply need to add an additional Windows feature.
In the following article, I will give you a really straightforward guide on how to install an SSH Server on Windows.
Keep reading to find out more!
#1: Activate OpenSSH Server on Windows
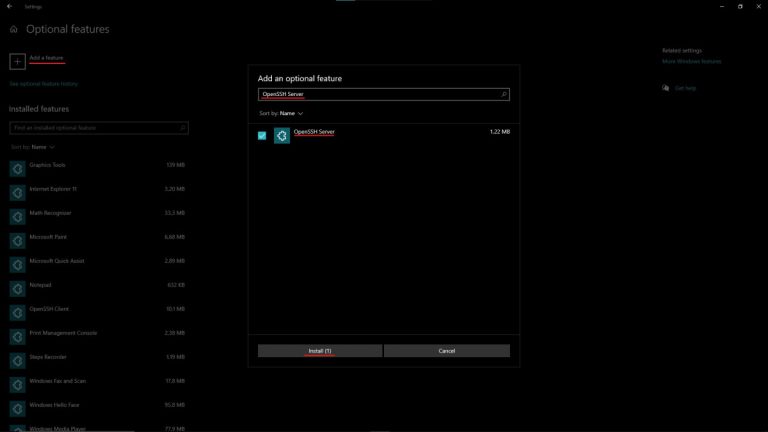
First, you need to add the optional Windows feature called “OpenSSH Server“. This version of OpenSSH is officially supported by Windows and can be directly installed from the Windows settings.
To do so, search for “manage optional features” in the windows search bar and hit Enter.
In the window that just opened up, click on “Add a feature“, then search for “OpenSSH Server“, tick the only result, and hit Install.
After the feature is done installing, you need to restart your computer.
#2: Start the SSH Server
Now that the OpenSSH server is installed, the next step is to change its startup type from Manual to Automatic in the service settings. This setting makes the Server start automatically whenever your computer is turned on. If you don’t want that, you can simply ignore this step and leave it set to Manual or Disabled.
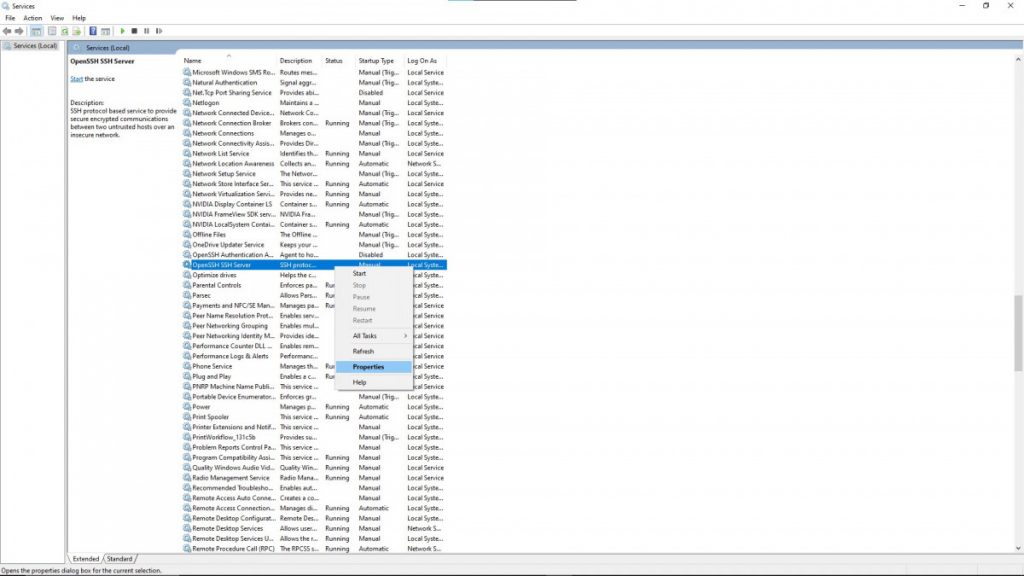
Open the service settings by searching for “services” in the Windows search bar.
Now you should be able to see a big list of different services. In there, search for a service called “OpenSSH SSH Server” and right-click it to open its Properties.
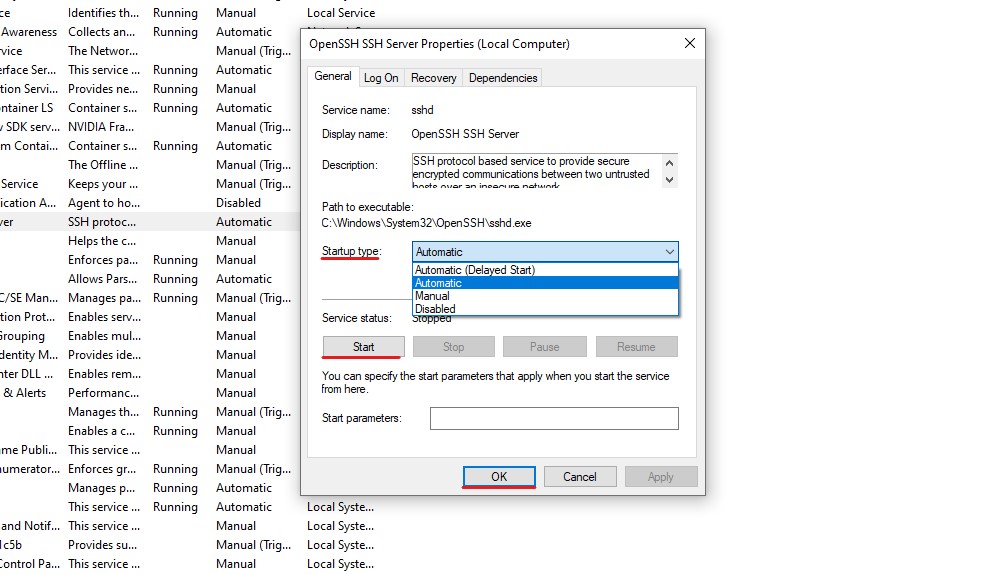
Under the tab “General“, there is a drop-down menu called Startup type, which is set to Manual. In order to make the server start on its own, you need to change that to either Automatic or Automatic (Delayed Start).
Automatic (Delayed Start) waits for a few seconds after starting your computer to reduce its startup time. However, if you don’t have a lot of auto-start programs, you can go with Automatic.
Now you can start the service and hit OK to apply the changes.
#3: Add a New Firewall Rule
The SSH Server is now set up and running. However, there’s still something left to do.
If you want to connect to your Windows computer from another computer (what you’ll probably want to do with SSH), you need to add a new firewall rule to the Windows firewall.
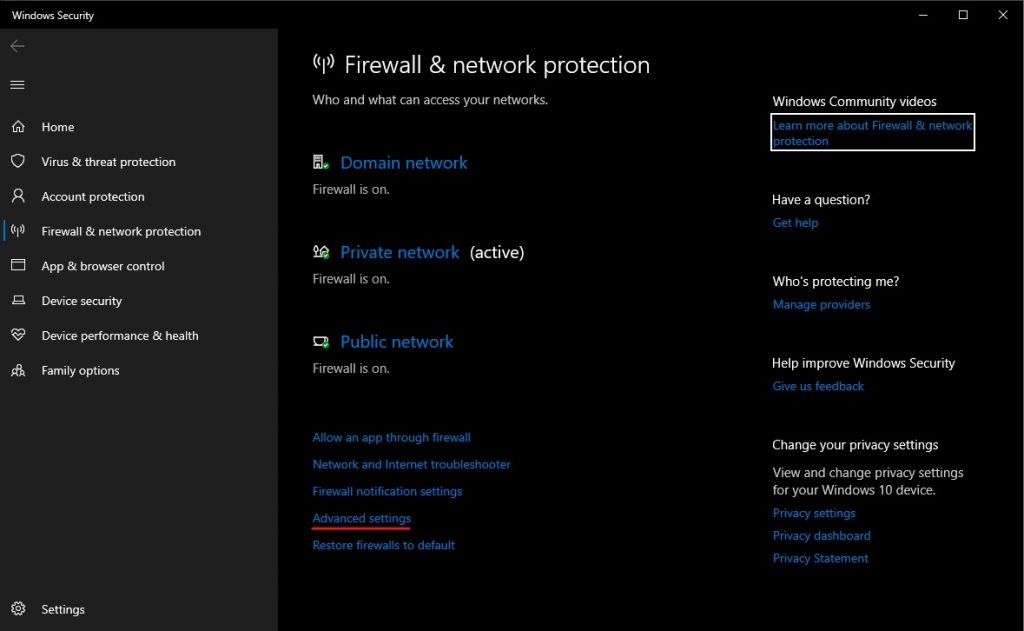
Therefore, search for “firewall & network protection” in the Windows search.
A new settings window will open. There you want to click on “Advanced settings“
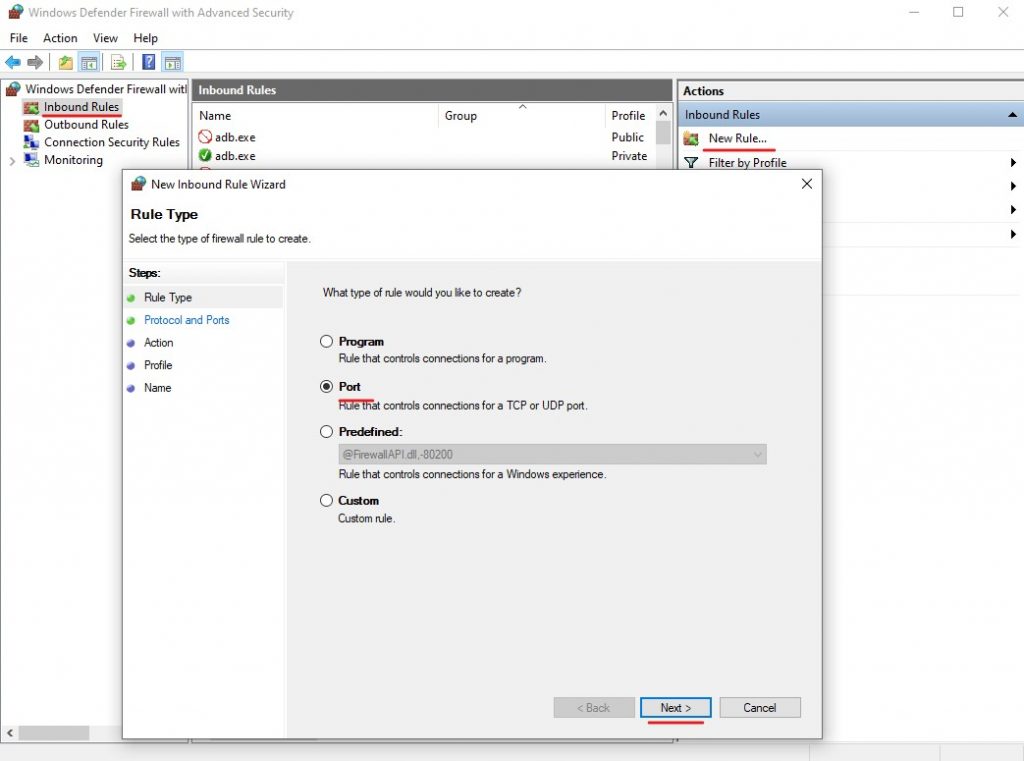
Next, click “Inbound Rules” and then “New Rule…“. In the Inbound Rule Wizard, select Port and hit Next.
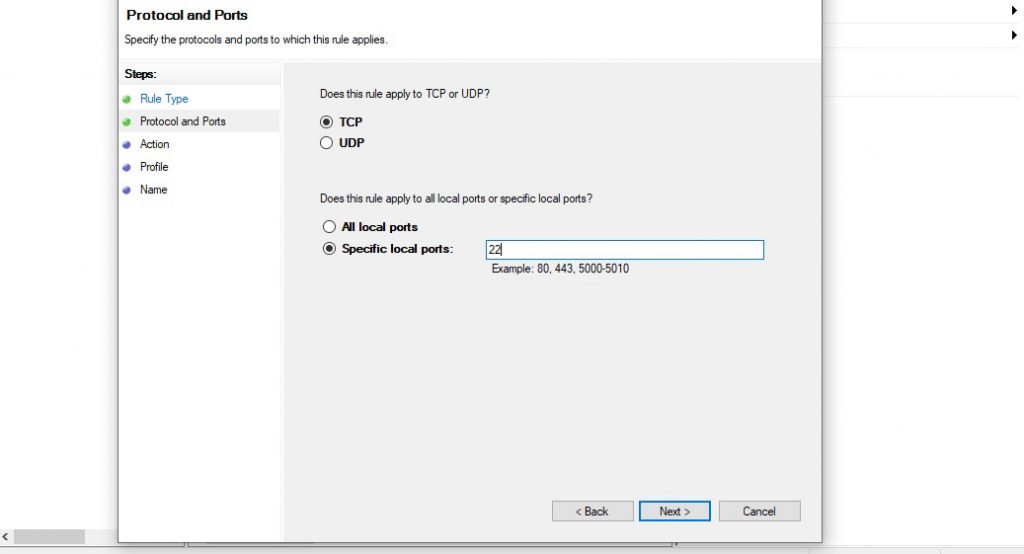
In the next window of the Wizard, choose TCP for the protocol and enter your SSH port (the standard port of SSH is 22).
Lastly, hit Next a few times until you are asked to enter a name for the new firewall rule. Something like “OpenSSH Server” makes sense here 😉
After you’ve done that, you are ready to connect to your Windows computer using SSH!
#4: Connect to your SSH Server on Windows!
Now that everything is set up, you can connect to your Windows computer using another device. To do so, you need to type the following command into your terminal (The command is the same on almost all operating systems):
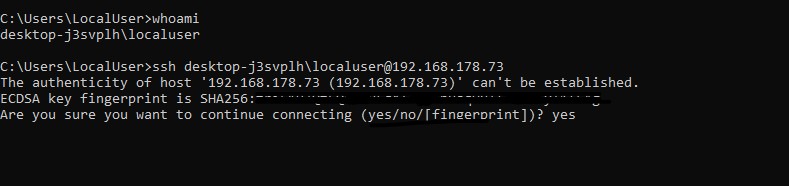
ssh <user>@<ip_address>
To get your username, type “whoami” in your terminal and hit enter. This command shows your username. Copy the whole response!
If you want to access your computer from a computer in the same network, use the local IP address of your computer.
If you want to connect from outside of your network, use the public IP address. Keep in mind that you may need to open ports on your router.
Here’s how you can find out your IP addresses
After the connection is established, you will be asked to accept the server’s “fingerprint”. Type in yes and hit enter.
Now you will need to enter a password.
If your Windows user is connected to a Microsoft account, use the password of your Microsoft account.
For me, however, the Microsoft password did not work. If you encounter the same problem, you need to create a new local Windows user, which is not connected to a Microsoft account, and use it to log into your computer via SSH.
Thanks for reading!