

If you have ever worked with microcontrollers like the ESP32 or Arduino, you have probably heard about Real-Time Operating Systems (RTOS), most likely FreeRTOS. When I got into microcontrollers, I also asked myself: What is FreeRTOS and why is everyone talking about it?
When I was in that situation, I wished there would be a guide that explained all the important fundamentals to me. Guess what! I have created that guide for you to get started with FreeRTOS today!
Keep reading to find out what FreeRTOS is, how it works, and how it is implemented on Arduino and ESP32.
What is an RTOS?
RTOS is short for Real-Time Operating System. Unlike traditional operating systems like Windows or Linux, Real-Time Operating Systems are very lightweight and only have the most essential functions of a traditional operating system. As a result, RTOS can run on low-power devices like microcontrollers.
But why do we need operating systems for microcontrollers? Usually, microcontrollers don’t have any operating system. They simply run the code you upload. However, having an operating system can be useful if you want to get into multitasking and running tasks simultaneously.
Most microcontrollers only have two CPU cores which means you can run two tasks at the same time.
What an operating system does for you, is managing those tasks and the CPU cores. That means you can run multiple tasks on only two cores because the RTOS shares the cores between those tasks.
Why use FreeRTOS?
FreeRTOS is one of the most popular real-time operating systems for microcontrollers like the ESP32 and Arduino. Its main advantage is its simplicity and lightweight design, which makes it ideal for microcontrollers with limited memory and processing power.
Unlike other RTOS, FreeRTOS is open-source and free to use. Hence, it is backed by a large community, well documented, and has many resources to learn from.
Another advantage of FreeRTOS is its portability, which means that it can run on a wide variety of microcontrollers.
Which Microcontrollers Support FreeRTOS?
These popular Microcontroller(-boards) support FreeRTOS besides some less-known ones:
- ESP32 and ESP8266
- Arduino Uno R3 , Uno R4, Nano, Leonardo, Mega
- STM32
- Raspberry Pi Pico, Pico 2 (RP2040, RP2350)
- nRF52
How FreeRTOS Works
In a standard microcontroller, your code runs in a continous loop. For instance, that loop could be the loop() function on the Arduino.
As you probably know, there’s only one loop function, which means, you can only run one piece of code at the same time.
With FreeRTOS, you can create tasks, which are independent pieces of code that run concurrently. For example, one task could blink an LED, while another monitors a sensor or handles network communication. FreeRTOS switches between tasks very quickly, giving the appearance that everything is happening at the same time.
This means tasks don’t really run simultaneously. The real-time operating system is just switching between them very quickly.

The Scheduler
The main component of an RTOS is the scheduler. The scheduler is responsible for deciding which task runs next and when to switch tasks.
Therefore, every task is assigned a priority. High-priority tasks are run before lower-priority tasks.
Switching tasks can be based on pre-defined time slices or events like task completion or waiting for input/output. For example, if a task is waiting for user input, it is suspended to memory and another task can run in the meantime.
Context Switching
I just mentioned “suspending a task to memory“. But what does that mean?
If the scheduler decides to switch tasks, the state of the task that is currently running is saved to memory. The state (context) of a program contains the CPU register, the program counter, and the stack pointer.
Now, the context of the next task is loaded from memory into the CPU register, the program counter, and the stack pointer. This way, the task can continue exactly where it left off.

Implementing FreeRTOS on Arduino and ESP32
Let’s learn how to use FreeRTOS on Arduino and ESP32!
At first, we will have a look at how to set everything up for both platforms. Afterward, I am going to show you the most important functions you need to get started.
Setting up FreeRTOS on ESP32 using the Arduino IDE
If you’ve already set up the ESP32 in Arduino IDE, there’s no need to set anything up here! Otherwise, if you need help setting up the Arduino IDE for use with ESP32, check out this guide.
As FreeRTOS is implemented natively on the ESP32, it allows you to use FreeRTOS functions directly from the Arduino IDE without needing to include any additional libraries.
FreeRTOS on Arduino
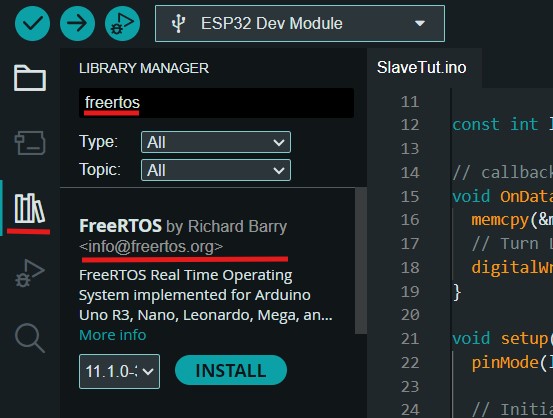
If you are using an Arduino board, you will need to install and include a special library to make use of FreeRTOS functions. This library is called FreeRTOS by Richard Barry.
After installing the library, you need to import it in your code to make use of all the functions:
#include <Arduino_FreeRTOS.h>
Multitasking with FreeRTOS in the Arduino IDE
Now that FreeRTOS is set up for your microcontroller board, we finally get to the programming part!
In the following example, I will show you how to run two separate tasks simultaneously. The goal is to blink two LEDs with different timing.
The first step is to define our two tasks as two separate functions:
				void task1(void *parameters) {
    while (true) {
        digitalWrite(LED_ONE, HIGH);
        vTaskDelay(1000 / portTICK_PERIOD_MS); // Delay for 1 second
        digitalWrite(LED_ONE, LOW);
        vTaskDelay(1000 / portTICK_PERIOD_MS); // Delay for 1 second
    }
}

void task2(void *parameters) {
    while (true) {
        digitalWrite(LED_TWO, HIGH);
        vTaskDelay(500 / portTICK_PERIOD_MS); // Delay for 0.5 seconds
        digitalWrite(LED_TWO, LOW);
        vTaskDelay(500 / portTICK_PERIOD_MS); // Delay for 0.5 seconds
    }
}
Note that we are not using the standard delay() function. Instead, we use vTaskDelay() to tell the microcontroller that it can suspend the task for the given time.
Actually, vTaskDelay doesn’t take time as input; rather, it takes a number of ticks. However, we can convert the time we want to suspend a task into ticks by dividing the number of milliseconds by the portTICK_PERIOD_MS constant.
After defining our two tasks, we need to start them using the xTaskCreate() function:
				xTaskCreate(
    task1, // task function
    "Task 1", // task name
    1000, // stack size
    NULL, // function parameters
    1, // task priority
    NULL // task handle
);
xTaskCreate(task2, "Task 2", 1000, NULL, 1, NULL);
The function for creating a task takes 6 arguments.
The first one is the function we defined our task with. In addition, we need to assign a name to that task.
Each task has its own stack memory. Hence, we need to set its size (in words) using the third argument.
Also, we can pass a pointer to variables that should be the task’s arguments.
The fifth value is the priority of a task. A higher number corresponds to a higher priority.
The last of the six arguments is a pointer to a task handle.
Task Handle
A task handle can be used to control a task within a different task. For instance, you can suspend Task1 within Task2.
It is defined and passed in the following way:
				TaskHandle_t task1Handle = NULL;
...
xTaskCreate(task1, "Task 1", 1000, NULL, 1, &task1Handle);
Now we could suspend Task 1 inside of Task 2.
				void task2(void *parameters) {
    ...
    vTaskSuspend(task1Handle); // Suspend Task 1
    vTaskDelay(1000 / portTICK_PERIOD_MS); // Wait for one second
    vTaskResume(task1Handle); // Resume Task 1
}
That’s basically what you need to get started with multitasking using FreeRTOS! Of course, FreeRTOS offers many more features and functionalities. Check out the official documentation for all the details.
Full Example Code
				//#include <Arduino_FreeRTOS.h> // ONLY FOR ARDUINO BOARDS

#define LED_ONE 2
#define LED_TWO 15

TaskHandle_t task1Handle = NULL; // Task handle for task 1

void task1(void *parameters) {
    Serial.println("Task 1 started");
    int *args = (int *)parameters; // Cast parameters to int*
    int delayOn = args[0];         // On delay
    int delayOff = args[1];        // Off delay

    while (true) {
        digitalWrite(LED_ONE, HIGH);
        vTaskDelay(delayOn / portTICK_PERIOD_MS); // Delay for On time
        digitalWrite(LED_ONE, LOW);
        vTaskDelay(delayOff / portTICK_PERIOD_MS); // Delay for Off time
    }
}

void task2(void *parameters) {
    Serial.println("Task 2 started.");
    while (true) {
        digitalWrite(LED_TWO, HIGH);
        vTaskDelay(500 / portTICK_PERIOD_MS); // 0.5 second
        digitalWrite(LED_TWO, LOW);
        vTaskDelay(500 / portTICK_PERIOD_MS); // 0.5 second
    }
}

void setup() {
    Serial.begin(9600);
    Serial.println("Initializing tasks...");

    pinMode(LED_ONE, OUTPUT);
    pinMode(LED_TWO, OUTPUT);

    // Parameter array for task1
    static int argArray[2] = {1000, 250}; // On/off delays in ms

    xTaskCreate(task1, "Task 1", 1000, (void *)argArray, 1, &task1Handle);
    xTaskCreate(task2, "Task 2", 1000, NULL, 1, NULL);

    Serial.println("Tasks created.");
}

void loop() {
    vTaskDelay(5000 / portTICK_PERIOD_MS); // Wait for 5 seconds

    Serial.println("Loop: Suspending Task 1...");
    vTaskSuspend(task1Handle); // Suspend task1
    vTaskDelay(5000 / portTICK_PERIOD_MS); // Wait for 5 seconds

    Serial.println("Loop: Resuming Task 1...");
    vTaskResume(task1Handle); // Resume task1

    vTaskSuspend(NULL); // Suspend loop task (NULL = current task)
}
Conclusion
FreeRTOS is a game-changer for developers working with microcontrollers, enabling multitasking and efficient resource management.
By understanding its basics, how it works, and how to set it up on platforms like Arduino and ESP32, you can unlock new possibilities for your embedded projects. Whether you’re managing multiple tasks, optimizing system responsiveness, or building complex IoT systems.
Get started with FreeRTOS using your Arduino or ESP microcontroller today!
Feel free to share your thoughts in the comments and consider sharing this article!
Happy Coding!