

ESP-NOW, a lightweight and fast wireless protocol by Espressif, is widely used in many IoT projects because it enables seamless communication between ESP microcontrollers. However, without encryption, this communication is vulnerable to unauthorized access. In this comprehensive guide, I will show you, why encryption is important, how the encryption works, and how to encrypt your ESP-NOW messages with practical code examples!
A Brief Introduction to ESP-NOW
For those unfamiliar with ESP-NOW, it is a wireless protocol developed by Espressif, the founder of the ESP microcontrollers. It allows ESP32 or ESP8266 boards to communicate with one another. ESP-NOW has the advantage over traditional WiFi communication because it doesn’t require an established connection between the devices. Also, there’s no need for a router, as the microcontrollers communicate directly.
If you want to learn more about how ESP-NOW works, you can read this article, in which I explain the protocol more thoroughly.
Encrypt ESP-NOW: Why Encryption is Important
Encryption is crucial for IoT applications and other projects where sensible data is shared between devices. It prevents unauthorized access by protecting the data from interception, ensures data integrity by guaranteeing that the data sent between devices remains untampered, and enhances user trust by adding a layer of reliability to the system, making it more robust and secure.
How ESP-NOW Encryption with CCMP Works
ESP-NOW uses the Counter Mode with Cipher Block Chaining Message Authentication Code Protocol (CCMP) to encrypt the wireless communication between devices.
CCMP is a standardized protocol for ensuring confidentiality and data integrity.
To encrypt ESP-NOW messages, we use a Primary Master Key (PMK) and a Local Master Key (LMK). The PMK is a shared key used across the entire network, while the LMK is a device-specific key that encrypts the actual data using AES-128 in Counter Mode with a Message Integrity Code (MIC) for authentication. Both the PMK and LMK are 16 bytes long.
In an encrypted ESP-NOW network with multiple devices, the PMK is shared among all nodes, but each device has a unique LMK for securing individual transmissions.
Step-by-Step: How to transmit Encrypted Data with ESP-NOW
Let’s Implement ESP-NOW encryption using an ESP32 microcontroller and the Arduino IDE!
In this example, we will send an encrypted “hello world” message from a server to a client.
#1 Setting Up the Arduino IDE
If you haven’t done so already, you need to make sure that you can upload code from your Arduino IDE to the ESP board.
Therefore, you must add the ESP32’s additional board manager URL in the IDE.
Place the following URL in the text field under Files > Preferences > Settings.
https://raw.githubusercontent.com/espressif/arduino-esp32/gh-pages/package_esp32_index.jsonNext, install the “esp32” boards manager by Espressif Systems and choose the correct board type and COM port while your ESP board is plugged in.
Luckily, we don’t need any additional libraries, as encryption is a standard feature of ESP-NOW.
If you need more guidance, check out this guide, where I explain how to install ESP32 in the Arduino IDE.
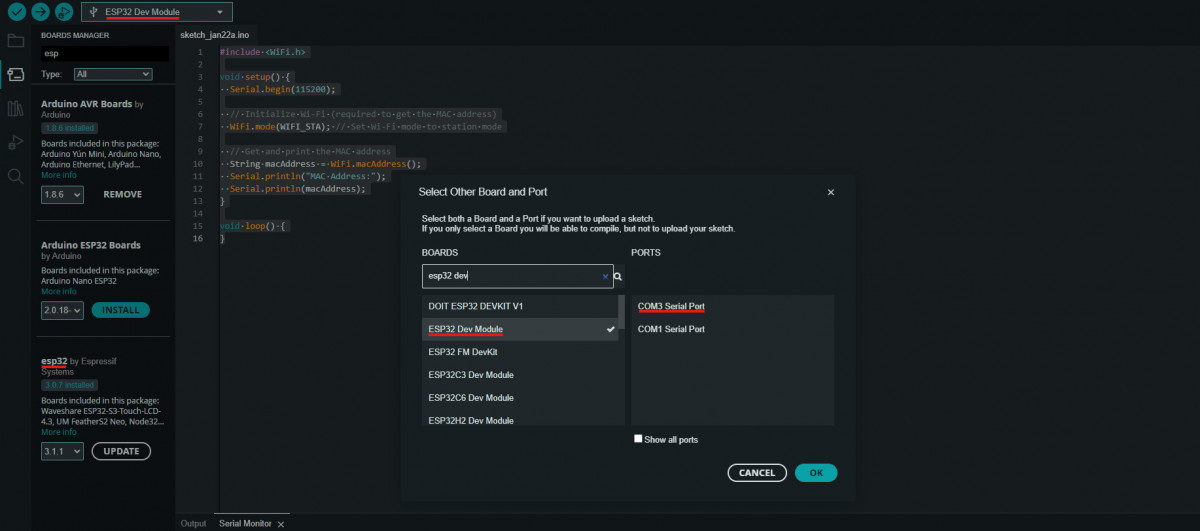
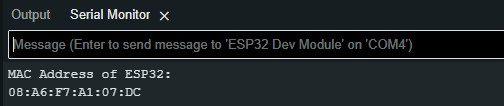
#2 Getting the MAC Address of an ESP32 Board
Each ESP32 board has its own MAC address, a unique identifier for this particular board. We will need that address, so that both, the server and the client, can add each other as peers and communicate via ESP-NOW.
Upload the following sketch to both boards to gather their MAC addresses.
#include <WiFi.h>
#include <esp_wifi.h>

void getMacAddress(){
  uint8_t baseMac[6];
  esp_err_t ret = esp_wifi_get_mac(WIFI_IF_STA, baseMac);
  if (ret == ESP_OK) {
    Serial.printf("%02x:%02x:%02x:%02x:%02x:%02x\n",
                  baseMac[0], baseMac[1], baseMac[2],
                  baseMac[3], baseMac[4], baseMac[5]);
  } else {
    Serial.println("Failed to read MAC address");
  }
}

void setup(){
  Serial.begin(115200);

  WiFi.mode(WIFI_STA);
  WiFi.STA.begin();

  Serial.print("MAC Address: ");
  getMacAddress();
}

void loop(){
}
Make sure, you watch the serial monitor with the correct baud rate. In this case, the baud rate is set to 115200. If you can’t see a MAC address being printed, try pressing the reset button on your board while it is plugged in.
#3 Send Encrypted ESP-NOW Messages: Sender Sketch
Now that we have the MAC addresses, we can start with the encrypted communication sketch for the server (sender) board. Feel free to copy the complete sketch; I will explain it later.
#include <esp_now.h>
#include <WiFi.h>

// replace this with your receiver's MAC address
uint8_t receiverAddress[] = {0x08, 0xA6, 0xF7, 0xA1, 0x07, 0xDC};

// PMK and LMK keys
static const char* PMK = "1234567890123456";
static const char* LMK = "abcdefghijklmnop";

// structure the data, this must match the sensder side
typedef struct struct_message {
    int counter;
    char message[128];
} struct_message;

struct_message myData;

// keep track of packets
int counter;

esp_now_peer_info_t peerInfo;

// this callback function is executed any time data is sent
void OnDataSent(const uint8_t *mac_addr, esp_now_send_status_t status) {
  Serial.print("\r\nSend Status:\t");
  Serial.println(status == ESP_NOW_SEND_SUCCESS ? "Delivery Success" : "Delivery Fail");
}

void setup() {
  // initialize the serial output
  Serial.begin(115200);

  // set station mode
  WiFi.mode(WIFI_STA);

  // initialize ESP-NOW
  if (esp_now_init() != ESP_OK) {
    Serial.println("ESP-NOW couldn't be initialized! . . .");
    return;
  }

  // Set the PMK key
  esp_now_set_pmk((uint8_t *)PMK);

  // register the receiver as peer
  memcpy(peerInfo.peer_addr, receiverAddress, 6);
  peerInfo.channel = 0;
  // set the receiver LMK key
  for (uint8_t i = 0; i < 16; i++) {  // ensures the key isn't longer than 16 bytes
    peerInfo.lmk[i] = LMK[i];
  }
  // ENABLE ENCRYPTION
  peerInfo.encrypt = true;

  // add receiver as peer
  if (esp_now_add_peer(&peerInfo) != ESP_OK){
    Serial.println("Could not add peer! . . .");
    return;
  }

  // register for recv to receive data and run our callback function
  esp_now_register_send_cb(OnDataSent);
}

void loop() {
  // send a packet every 5 seconds
  static unsigned long lastEventTime = millis();
  static const unsigned long EVENT_INTERVAL_MS = 5000;
  if ((millis() - lastEventTime) > EVENT_INTERVAL_MS) {
    lastEventTime = millis();

    // set values to send
    myData.counter = counter++;
    snprintf(myData.message, sizeof(myData.message), "Hello from ESP-NOW! Packet %d", myData.counter);

    // send ENCRYPTED message via ESP-NOW
    esp_now_send(receiverAddress, (uint8_t *) &myData, sizeof(myData));
  }
}
MAC Address, PMK, and LMK keys
After including the WiFi and esp_now libraries, we specify the receiver’s MAC address and set the PMK and LMK keys. Make sure these are the same on the sender and receiver sides and are 16 bytes (characters) long.
Message structure
Next, we define the structure of the messages we send using ESP-NOW. In this example, our message contains a text and a counter that keeps track of all messages. We also create an instance of this message structure, called myData.
typedef struct struct_message {
    int counter; // keeping track of the messages
    char message[128]; // the text message itself
} struct_message;

struct_message myData;
OnDataSent callback function
Whenever the sender sends data, it automatically calls the OnDataSent function. In this function, we log to the serial monitor whether the data was sent successfully.
void OnDataSent(const uint8_t *mac_addr, esp_now_send_status_t status) {
  Serial.print("\r\nSend Status:\t");
  Serial.println(status == ESP_NOW_SEND_SUCCESS ? "Delivery Success" : "Delivery Fail");
}
Enable encryption
In the sketch’s default setup function, we initialize the serial output, set the WiFi mode to station mode, initialize and check ESP-NOW, and set the PMK for encryption.
esp_now_set_pmk((uint8_t *)PMK);Immediately after, we register the specified receiver MAC address for the peer by copying receiverAddress into peerInfo.peer_addr. We also set the LMK using a for-loop to ensure the key is no longer than 16 bytes (characters).
The most important step in encrypting ESP-NOW messages is enabling the built-in encryption of ESP-NOW.
  for (uint8_t i = 0; i < 16; i++) {
    peerInfo.lmk[i] = LMK[i];
  }
  // ENABLE ENCRYPTION
  peerInfo.encrypt = true;
Send data
In the last line of the setup, we register the callback function OnDataSent, so that it is called every time we send data.
esp_now_register_send_cb(OnDataSent);In the loop function, we send an encrypted ESP-NOW message to the receiver every 5 seconds. For each message, we increase the message counter and copy the message text into the corresponding myData attribute using snprintf.
Last but not least, we send the message off with the esp_now_send function.
  static unsigned long lastEventTime = millis();
  static const unsigned long EVENT_INTERVAL_MS = 5000;
  if ((millis() - lastEventTime) > EVENT_INTERVAL_MS) {
    lastEventTime = millis();

    myData.counter = counter++;
    snprintf(myData.message, sizeof(myData.message), "Hello from ESP-NOW! Packet %d", myData.counter);

    esp_now_send(receiverAddress, (uint8_t *) &myData, sizeof(myData));
#4 Receive Encrypted ESP-NOW Messages: Receiver Sketch
The Sketch for the client (receiver) is similar to the sender sketch. Again, feel free to copy it; I’ll explain it in the following.
#include <esp_now.h>
#include <WiFi.h>

// replace this with your sender's MAC address
uint8_t senderMacAddress[] = {0xA0, 0xA3, 0xB3, 0x2C, 0x77, 0xCC};

// PMK and LMK keys
static const char* PMK = "1234567890123456";
static const char* LMK = "abcdefghijklmnop";

// structure the data, this must match the sensder side
typedef struct struct_message {
    int counter;
    char message[128];
} struct_message;

struct_message myData;

// this callback function is executed any time data is received
void OnDataRecv(const uint8_t * mac_addr, const uint8_t *incomingData, int len) {

  memcpy(&myData, incomingData, sizeof(myData));
  Serial.print("Bytes received: ");
  Serial.println(len);
  Serial.print("Message: ");
  Serial.println(myData.message);
}
void setup() {
  // initialize the serial output
  Serial.begin(115200);

  // set station mode
  WiFi.mode(WIFI_STA);

  // initialize ESP-NOW
  if (esp_now_init() != ESP_OK) {
    Serial.println("ESP-NOW couldn't be initialized! . . .");
    return;
  }

  // set the PMK key
  esp_now_set_pmk((uint8_t *)PMK);

  // register the sender as peer
  esp_now_peer_info_t peerInfo;
  memcpy(peerInfo.peer_addr, senderMacAddress, 6);
  peerInfo.channel = 0;
  // set the sender LMK key
  for (uint8_t i = 0; i < 16; i++) { // ensures the key isn't longer than 16 bytes
    peerInfo.lmk[i] = LMK[i];
  }
  // ENABLE ENCRYPTION
  peerInfo.encrypt = true;

  // add sender as peer
  if (esp_now_add_peer(&peerInfo) != ESP_OK){
    Serial.println("Could not add peer! . . .");
    return;
  }

  // register for recv to receive data and run our callback function
  esp_now_register_recv_cb(esp_now_recv_cb_t(OnDataRecv));
}

void loop() {

}
MAC Address, PMK, and LMK keys
This time, specify the MAC address of the sender (server) device. Also, set the same PMK and LMK keys from the sender side. They must match, otherwise, the encryption and decryption don’t work.
Message structure
As already mentioned, the structure of messages must also match the structure from the server sketch. It contains a counter variable to keep track of the packets and a char array that holds the text message.
OnDataRecv callback function
Like the OnDataSent function of the sender, the OnDataRecv function is a callback function that gets called whenever data is received. In this function, we print out the size of the data in bytes and the actual message itself.
void OnDataRecv(const uint8_t * mac_addr, const uint8_t *incomingData, int len) {
  memcpy(&myData, incomingData, sizeof(myData));
  Serial.print("Bytes received: ");
  Serial.println(len);
  Serial.print("Message: ");
  Serial.println(myData.message);
}
Listen for messages
The last line of code in the setup function registers our callback function, onDataRecv, and starts listening for messages.
esp_now_register_recv_cb(esp_now_recv_cb_t(OnDataRecv));All the steps in between are almost the same as in the sender sketch. Thus, I don’t explain them for the receiver sketch separately.
Additional Tips for Secure Encryption
Just because you encrypt ESP-NOW communication in your projects doesn’t guarantee it is secure. In fact, there are some additional factors to take into account when encrypting your data.
- Make sure to rotate your encryption keys periodically. This ensures that if a key gets compromised, there won’t be that big of damage as it will be replaced or maybe even has been replaced already.
- Use unique keys for different devices and never use a key twice. That way, a single compromised key doesn’t expose the whole network.
- Always use keys that are randomly generated. If your key consists of words or common numbers it is likely to be brute-forced.
- The keys should be kept private. Never share the key with devices that don’t necessarily need to know it.
Conclusion
If you encrypt ESP-NOW communication in your next project, you can significantly enhance its security. By following this guide, your data remains protected from unauthorized access. With the right implementation, ESP-NOW can be both a powerful and secure protocol for wireless communication.
Next, check out the differences between the ESP32 and ESP8266 here!
I would be thrilled to learn about your projects in the comments!
Thanks for reading, happy coding!
Links marked with an asterisk (*) are affiliate links which means we may receive a commission for purchases made through these links at no extra cost to you. Read more on our Affiliate Disclosure Page.